Purchase and Release a Local Number
How to purchase a new local number and how to release one you no longer need.
Purchase a Local Number
| 1 | Log into your account. |
| 2 | Go to Inbound → Local Numbers. You’ll see all the local numbers that belong to your account. |
| 3 | Click the “Purchase” button and select the required information: Country — select the country. Province — this field currently asks you to select the type of local number, though its label hasn’t yet been updated to reflect that. If the Province selection list is empty, that number supports both voice and SMS.
City — select a city. This field is not mandatory. Available Local Numbers — choose a local number from the list, based on number, setup fee, and monthly fee. Make sure your account has sufficient balance to cover the setup and monthly fees. |
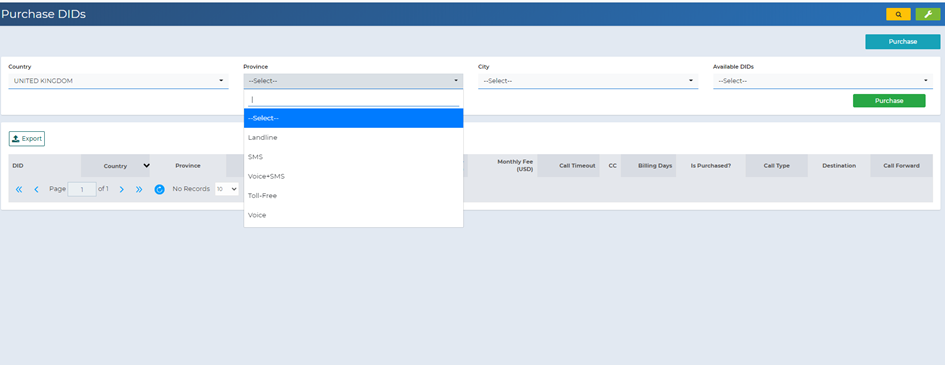
| 4 | Click the green “Purchase” button. A success message will appear on screen, and an email with your new local number’s information will be sent to your account. The new number will appear in your Local Numbers list, and your balance will be updated to reflect the number’s cost. |
| 5 | You’ll receive an email notification containing your new local number’s information. |
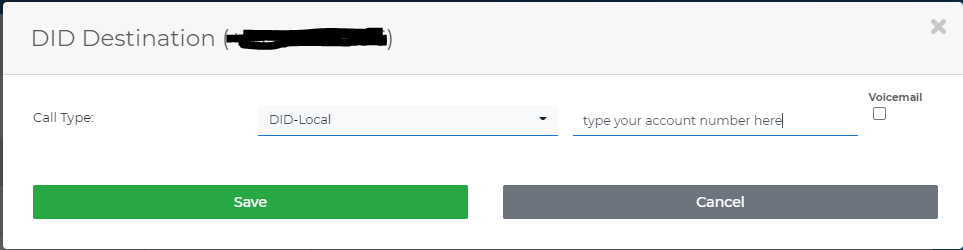
| 6 | Set your new number’s destination by clicking the arrow in the “Call Forward” field on your local number’s row.
To set your local extension, choose DID-Local in the Call Type selection box, then enter your account number — the number you used to sign in, which was sent to you by email with the subject “Welcome to ITC IP Technologies ltd.” at account creation.
Your softphone can now accept incoming calls on your new number. |

| 7 | You may also want to set your caller ID for outgoing calls made from your new local number. This guide will walk you through it. |